You can interact with the LUSID API using our Excel add-in.
Installing the LUSID Excel add-in
The LUSID Excel add-in requires a minimum of Microsoft Excel 2010 running on Windows.
Download the add-in. This is a zip file containing 32-bit and 64-bit versions of the add-in for the corresponding versions of Excel. If you are not sure which version of Excel you are running, contact your system administrator.
Locate the downloaded zip file on your computer and extract the add-in.
Repeat usage: To load the LUSID add-in and make it available each time Excel is launched, follow these Microsoft instructions.
Ad hoc usage: To use the add-in on a case-by-case usage double click the appropriate
.xllfile:
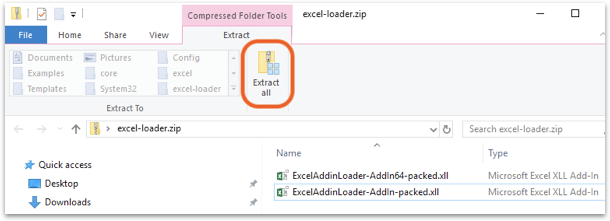
IMPORTANT: If you are using a 32-bit version of Excel, choose
ExcelAddinLoader-AddIn-packed.xll. For 64-bit versions of Excel, chooseExcelAddinLoader-AddIn64-packed.xll.
Running the LUSID Excel add-in
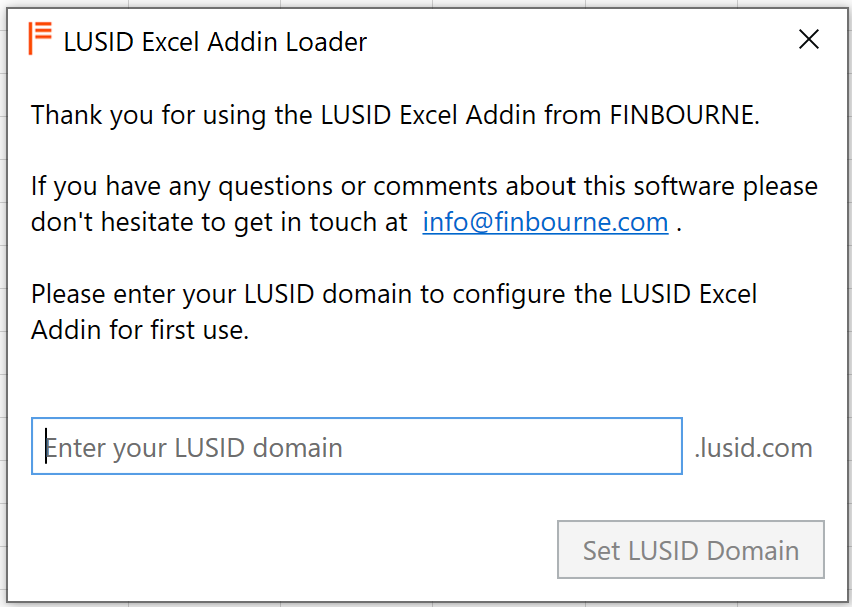
The first time you use the add-in you are prompted to enter your LUSID domain. The domain is the part of your address that is exclusively yours, so for example the XXX in XXX.lusid.com. You don’t need to enter the .lusid.com suffix:
Note: If you need to change the domain in future, it is stored in the
domain.txtfile in your<username>/AppData/Local/FinbourneExceldirectory.
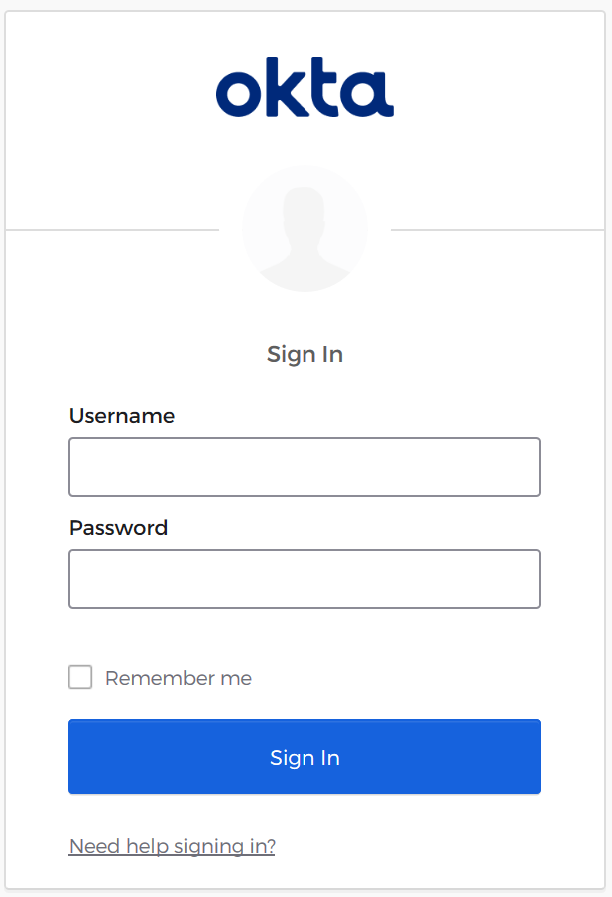
Next, enter your LUSID account username and password to load the add-in, and then complete multi-factor authentication:
Providing the Excel add-in has loaded correctly, a LUSID menu item appears on Excel's ribbon as shown below:

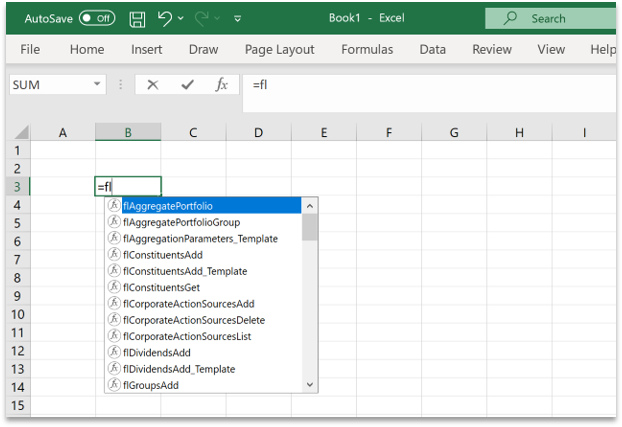
You can now begin to use the add-in and all the available LUSID functions:
If you have problems installing or running the add-in, please get in touch so we can help.
Using the LUSID Excel add-in
To help you get going, read the background information and complete the tutorial on setting up and valuing a basic IBOR, which can be driven via the LUSID Excel add-in.
We also have a set of Excel example templates on GitHub that demonstrate some of LUSID's features.