Providing you are a LUSID user with sufficient access control permissions, you can schedule a Luminesce SQL query to run automatically at a set time or on a regular basis.
Note: If you are the LUSID domain owner, you are automatically assigned the built-in
lusid-administratorrole, which has all the permissions necessary to use the providers in this article.
Once it has run, the results of the scheduled query are available in console format. However, it might be more useful to include an alternative output destination in the query itself, for example by using the Drive.SaveAs provider to write the results directly to a CSV file in Drive.
Using the LUSID web app
Sign in to the LUSID web app using the credentials of a LUSID administrator.
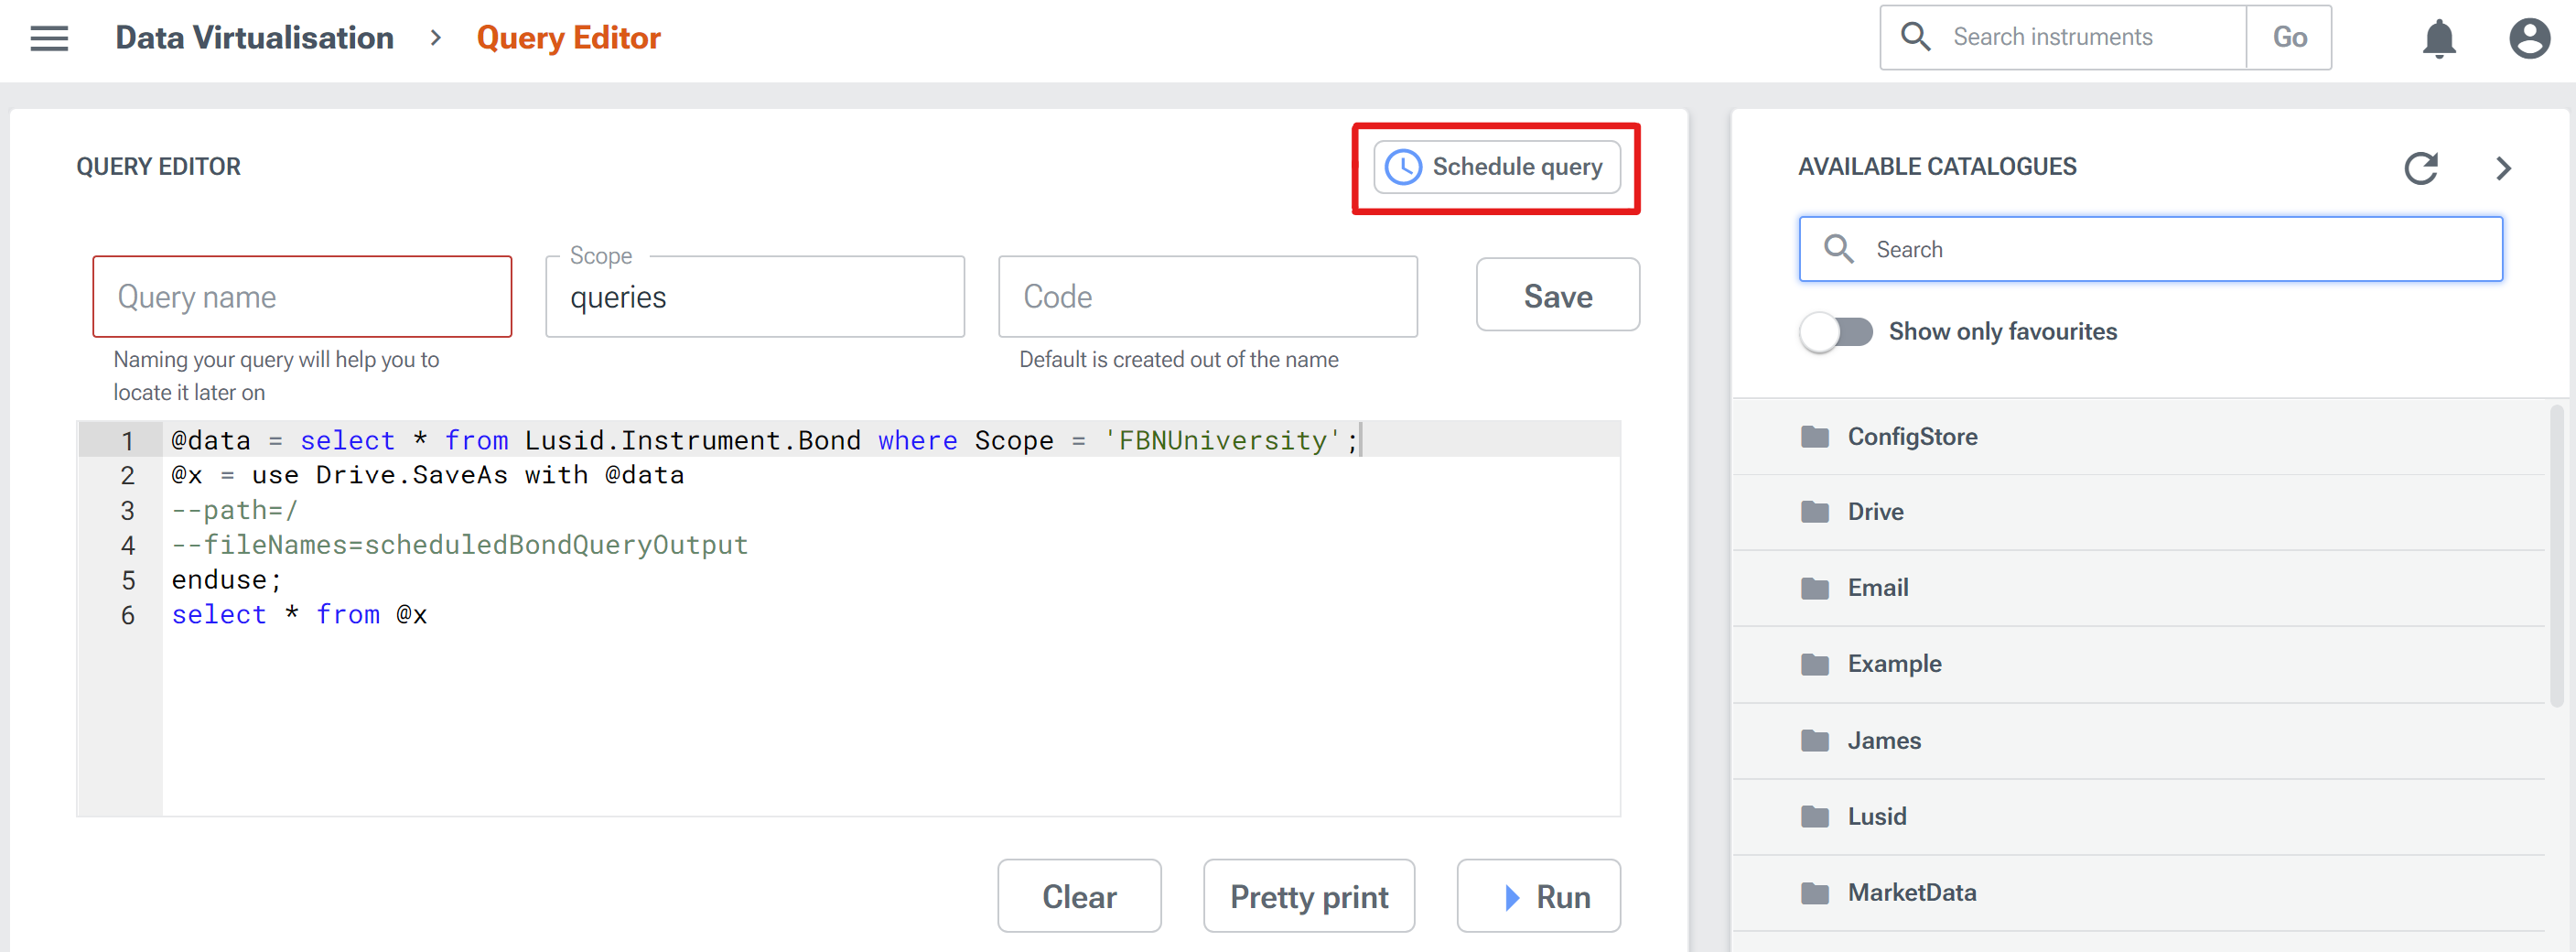
From the top left menu, select Data Virtualisation > Query Editor.
Write a valid query (you might want to click the Run button to test the results are as you expect).
Click the Schedule query button:

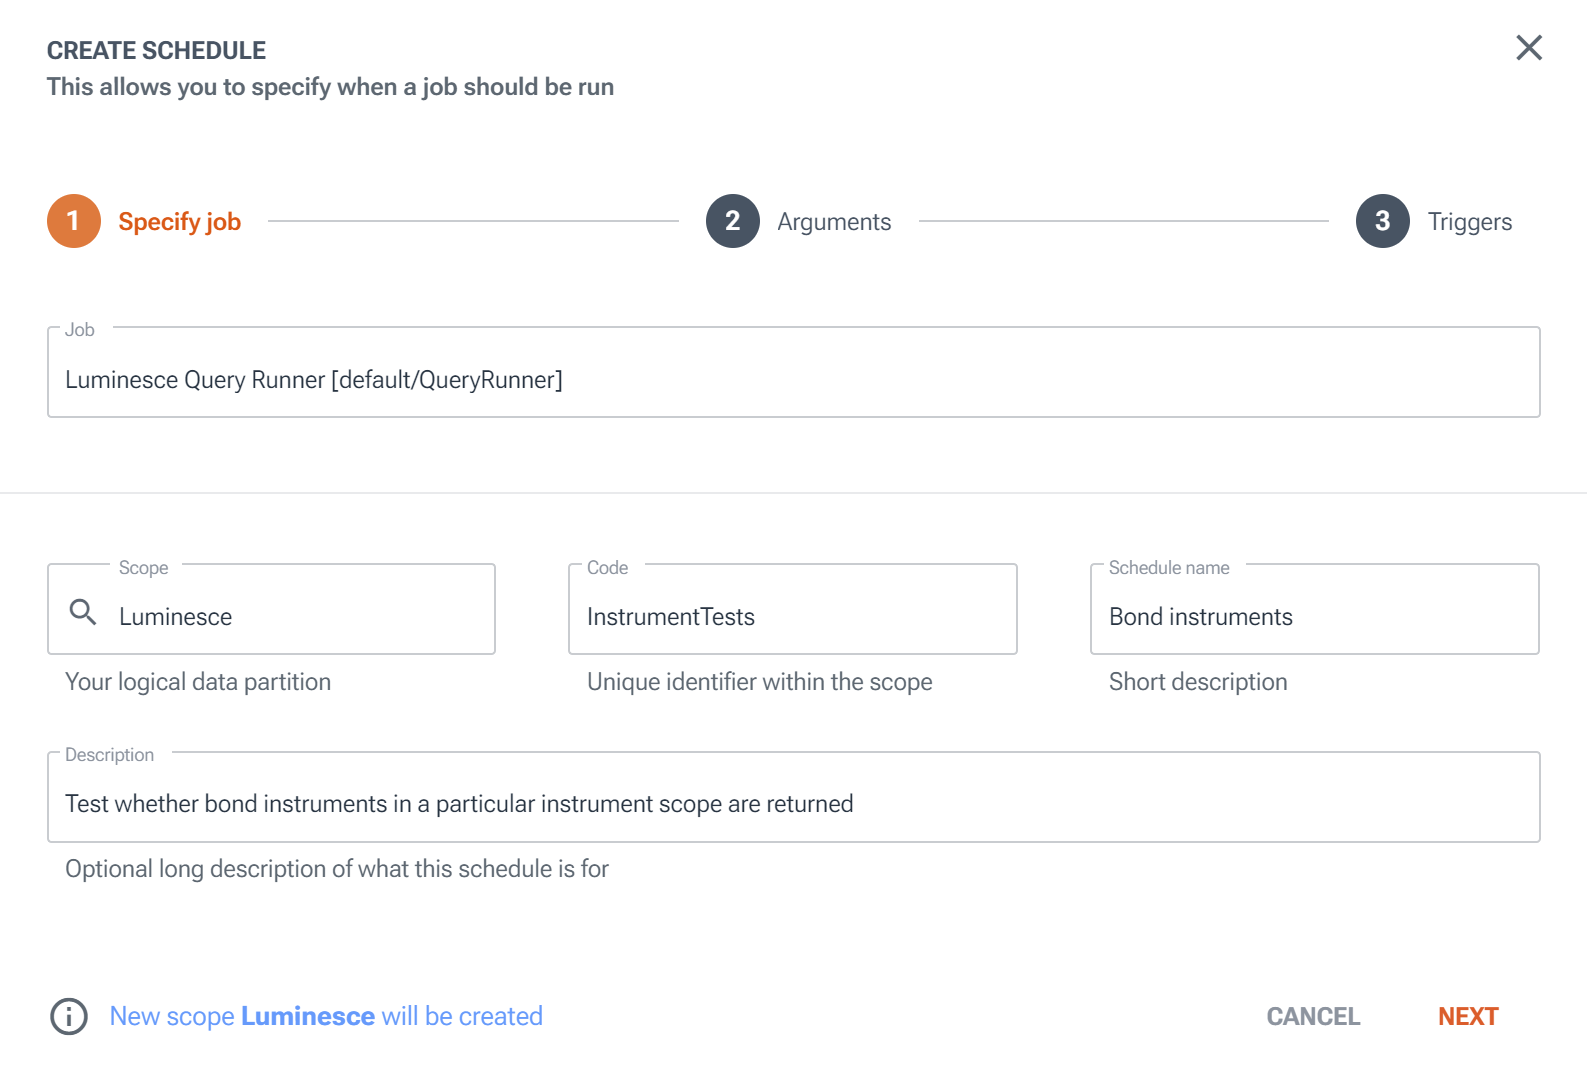
On the Specify job page of the Create Schedule screen, specify a Scope, Code, Schedule name and Description:

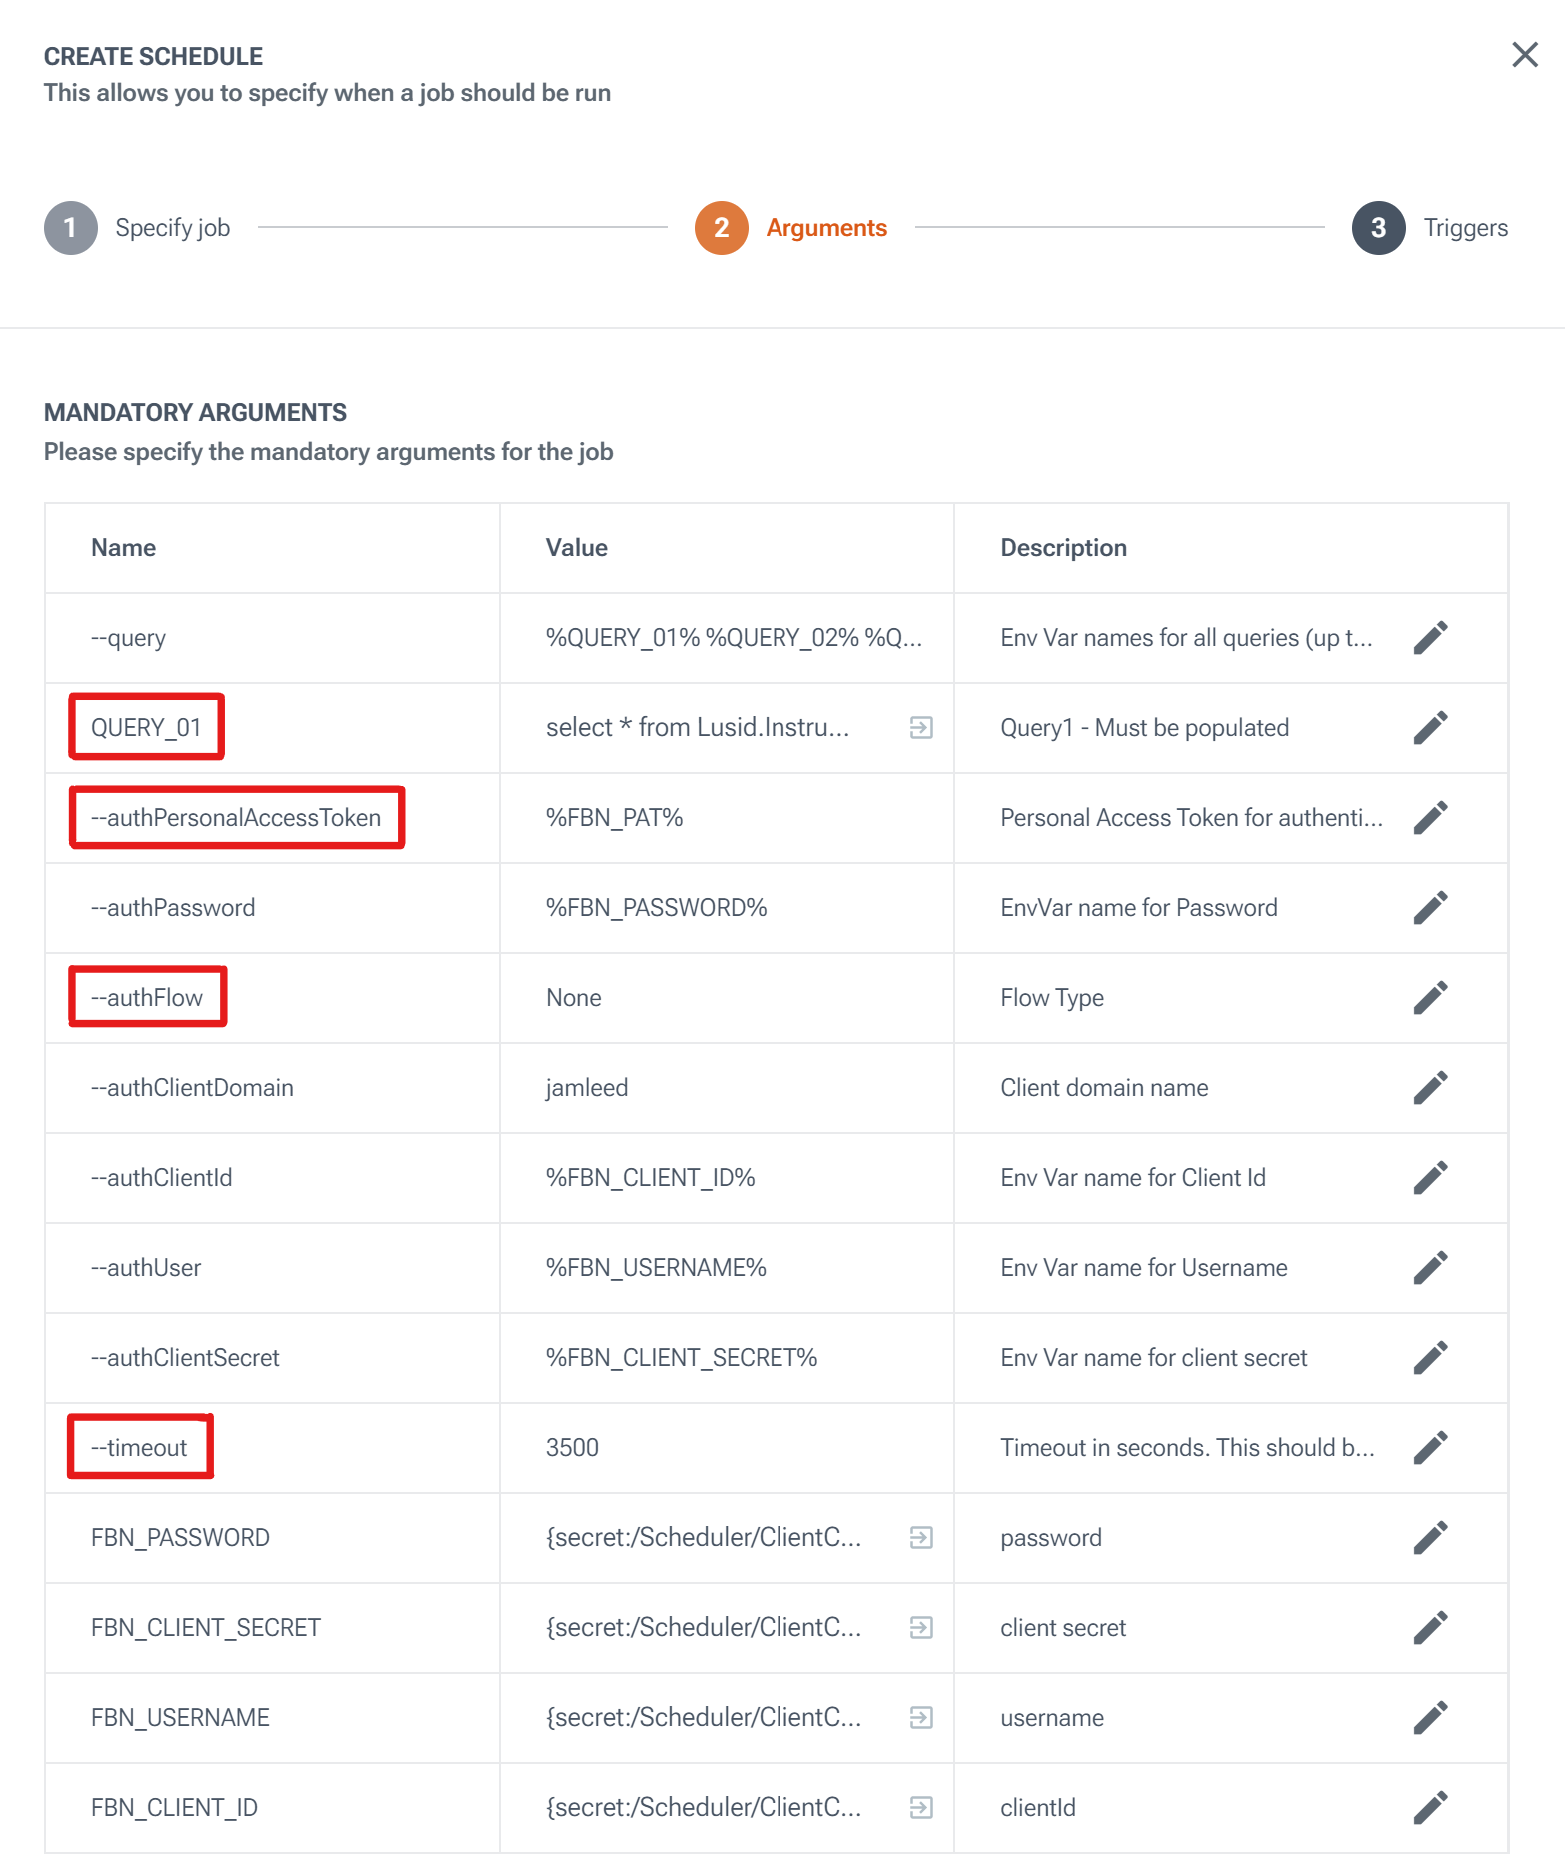
On the Arguments page, check the following mandatory arguments (boxes in red):
QUERY_01contains your Luminesce SQL query.--authPersonalAccessTokenis set to%FBN_PAT%. If not, perform Step 1 again.--authFlowis set toNone.--timeoutis set to3540or lower.
You can ignore all the other arguments.

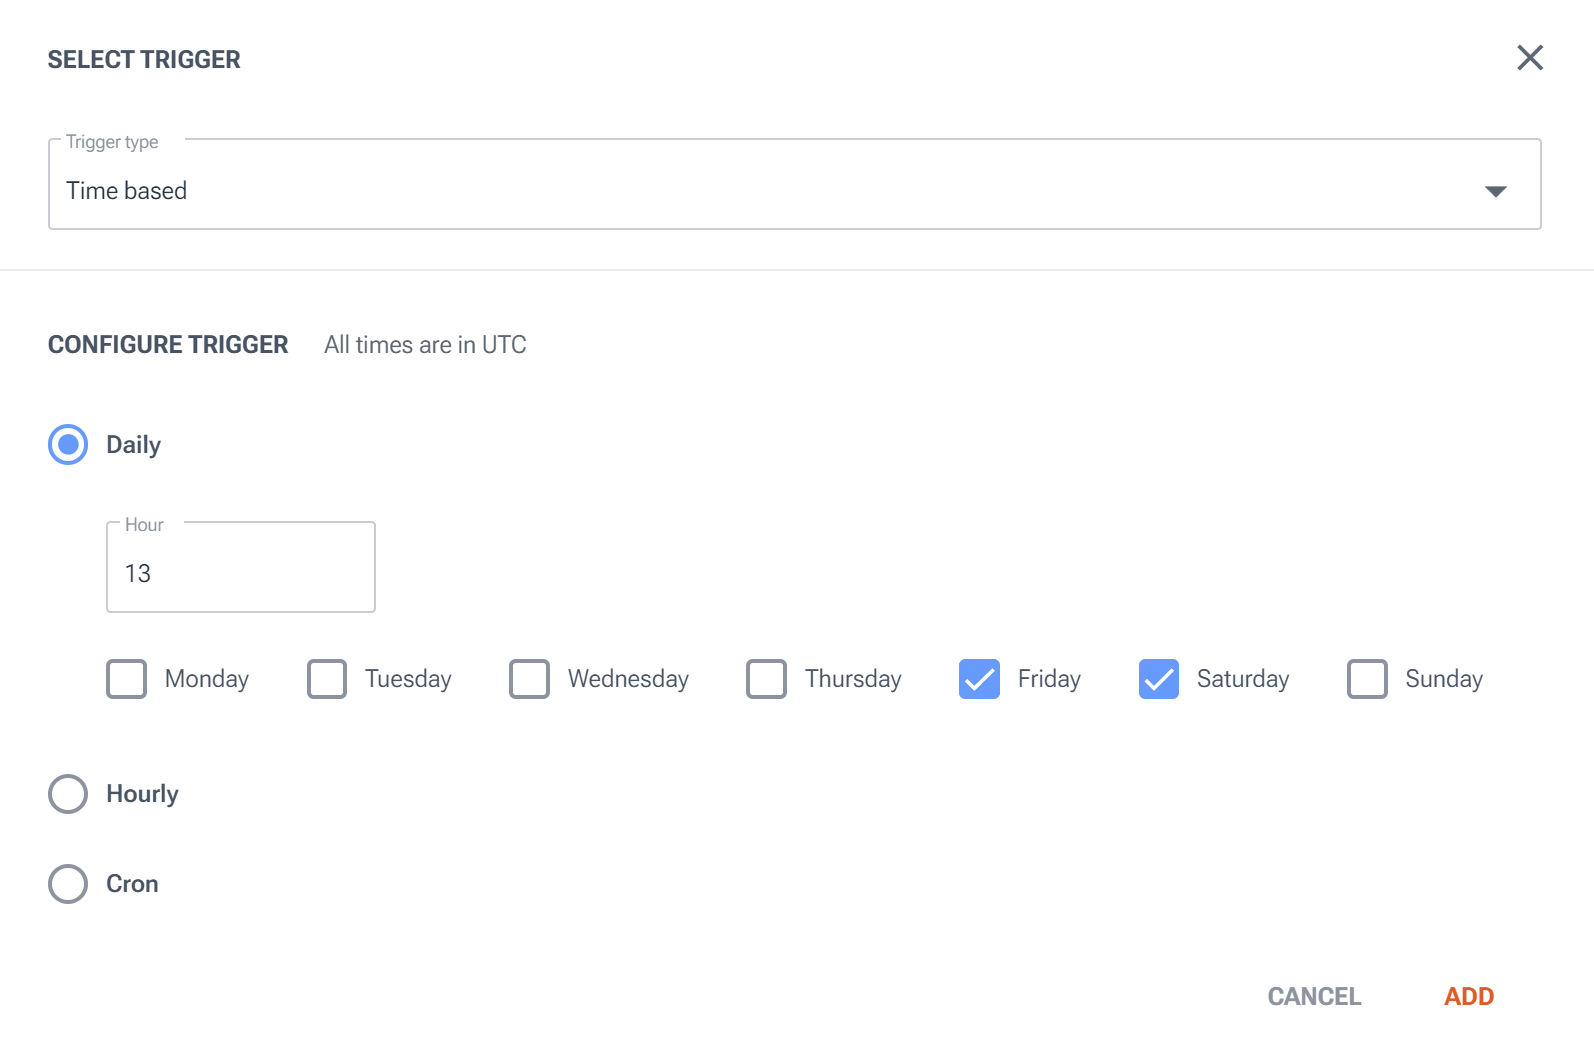
On the Triggers page, click the Add trigger button to add at least one trigger for the schedule (note all times are in UTC):

Note you can choose the Cron option to explicitly specify a cron expression adhering to this standard.
The scheduled query should now automatically run at the appointed time(s). You can see (and potentially pause) it by navigating to the Jobs & Scheduling > Schedules dashboard:
Once the scheduled query has run successfully, you can navigate to the Jobs & Scheduling > History dashboard and click on the appropriate Run ID URL to access the details:

On the Jobs & Scheduling > Details dashboard, navigate to the Console Output tab to see the query results:
.png)
