In this tutorial we’ll see how to authorise calls to the LUSID API, both directly to the REST API and indirectly using the SDK.
Let’s imagine we want to create an application or service that retrieves instruments from the LUSID Security Master. To do this, we need to authorise a call to the LUSID ListInstruments API.
Note: To complete this tutorial, you must yourself have suitable permissions. This can most easily be achieved by assigning your LUSID user the built-in
lusid-administratorrole. This should already be the case if you are the domain owner.
Step 1: Setting up a service user account with appropriate permissions
There are two types of user in LUSID, personal and service.
Whilst it is perfectly possible to use the credentials of a personal user to authorise calls to the LUSID API, we recommend using those of a service user instead, especially if you are creating an automated service. This is because the account is not tied to the email address of a person who might leave your organisation.
We recommend setting up one service user account per distinct application or service so that it only has permissions to perform the operations for which it is designed, and no more. In this tutorial we're going to use the default roles and policies provided with LUSID to grant access to the example data also provided with LUSID, but you can create your own policies if you wish.
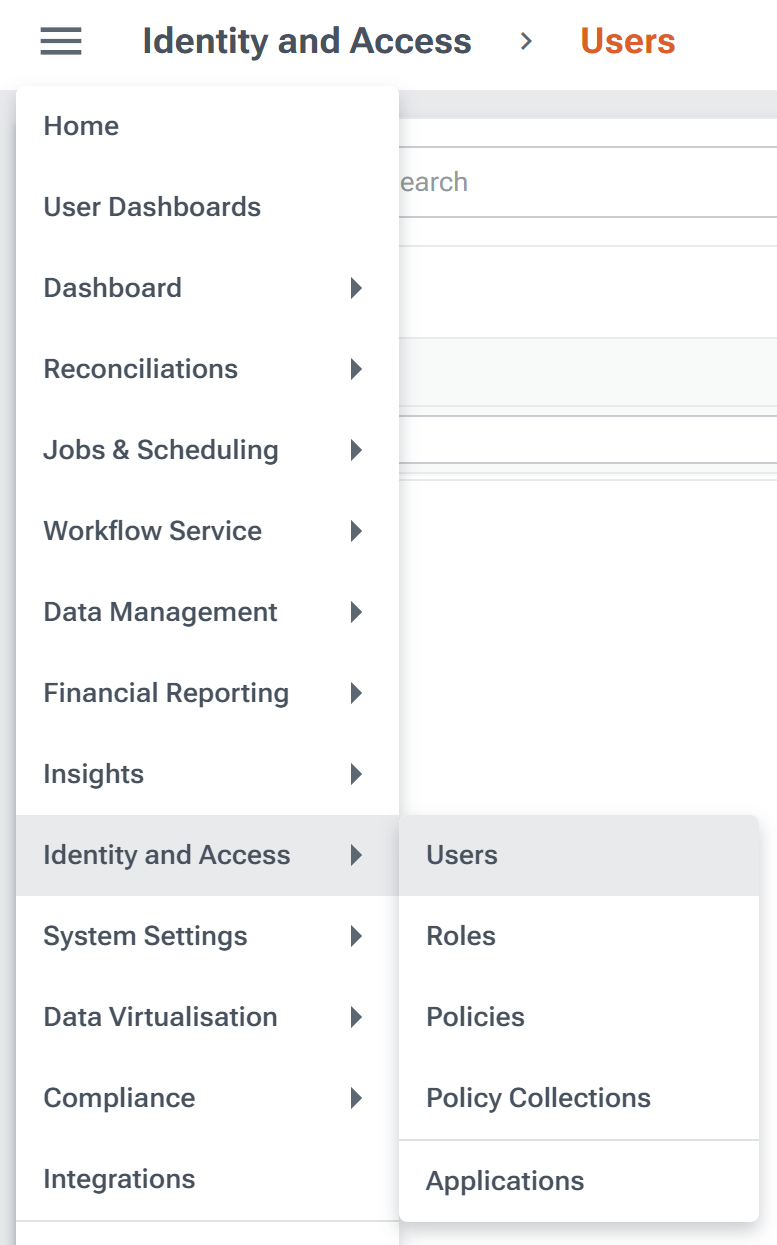
Sign in to the LUSID web app using the credentials of a LUSID administrator.
From the left-hand menu, select Identity and access > Users:
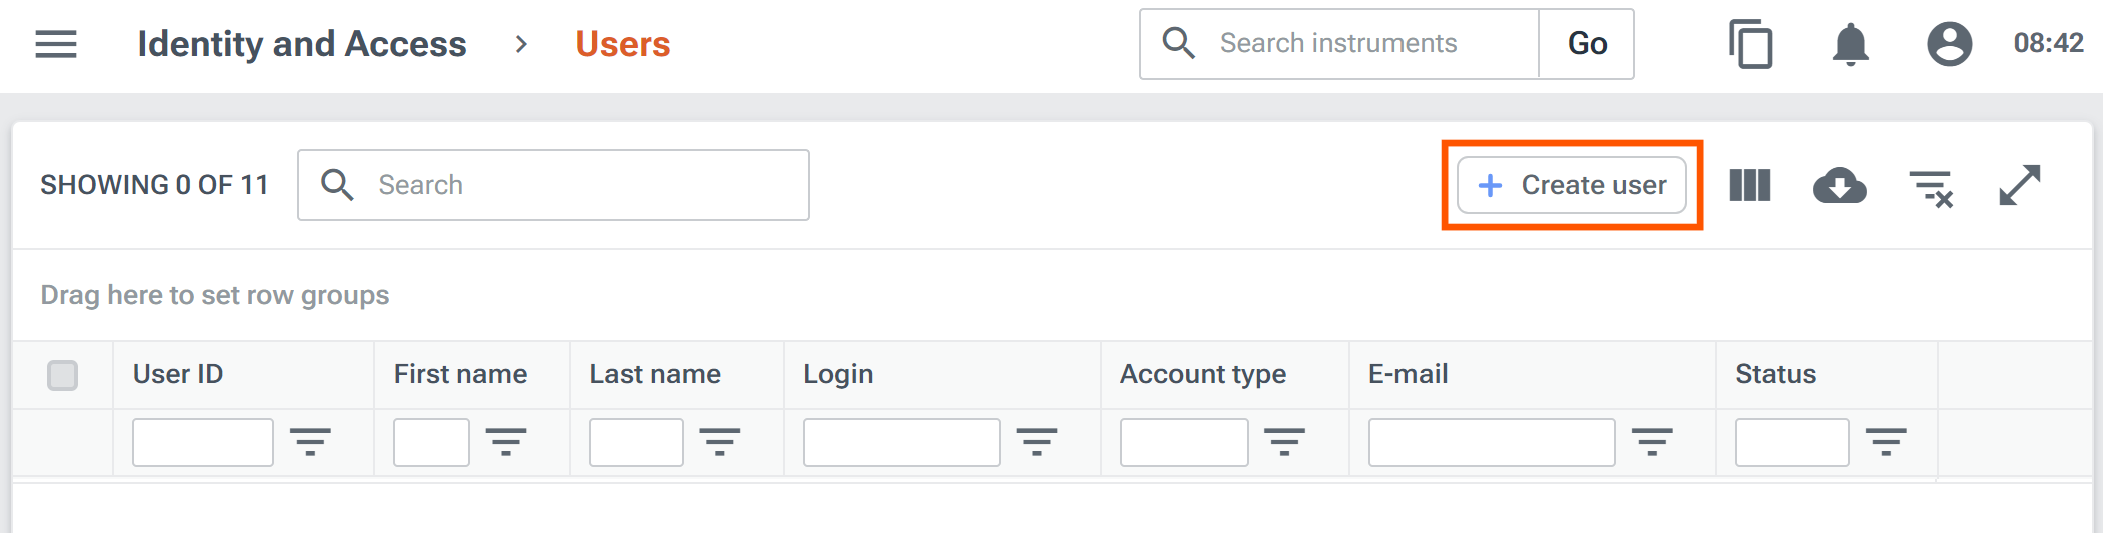
On the Users dashboard, click the Create user button:
Specify an Account type of
Service, enter your Email address to become the service owner, specify a Login user name (this must look like an email address but no email will be sent to it) and click the Add roles button to assign the defaultlusid-evaluatorrole provided with LUSID:
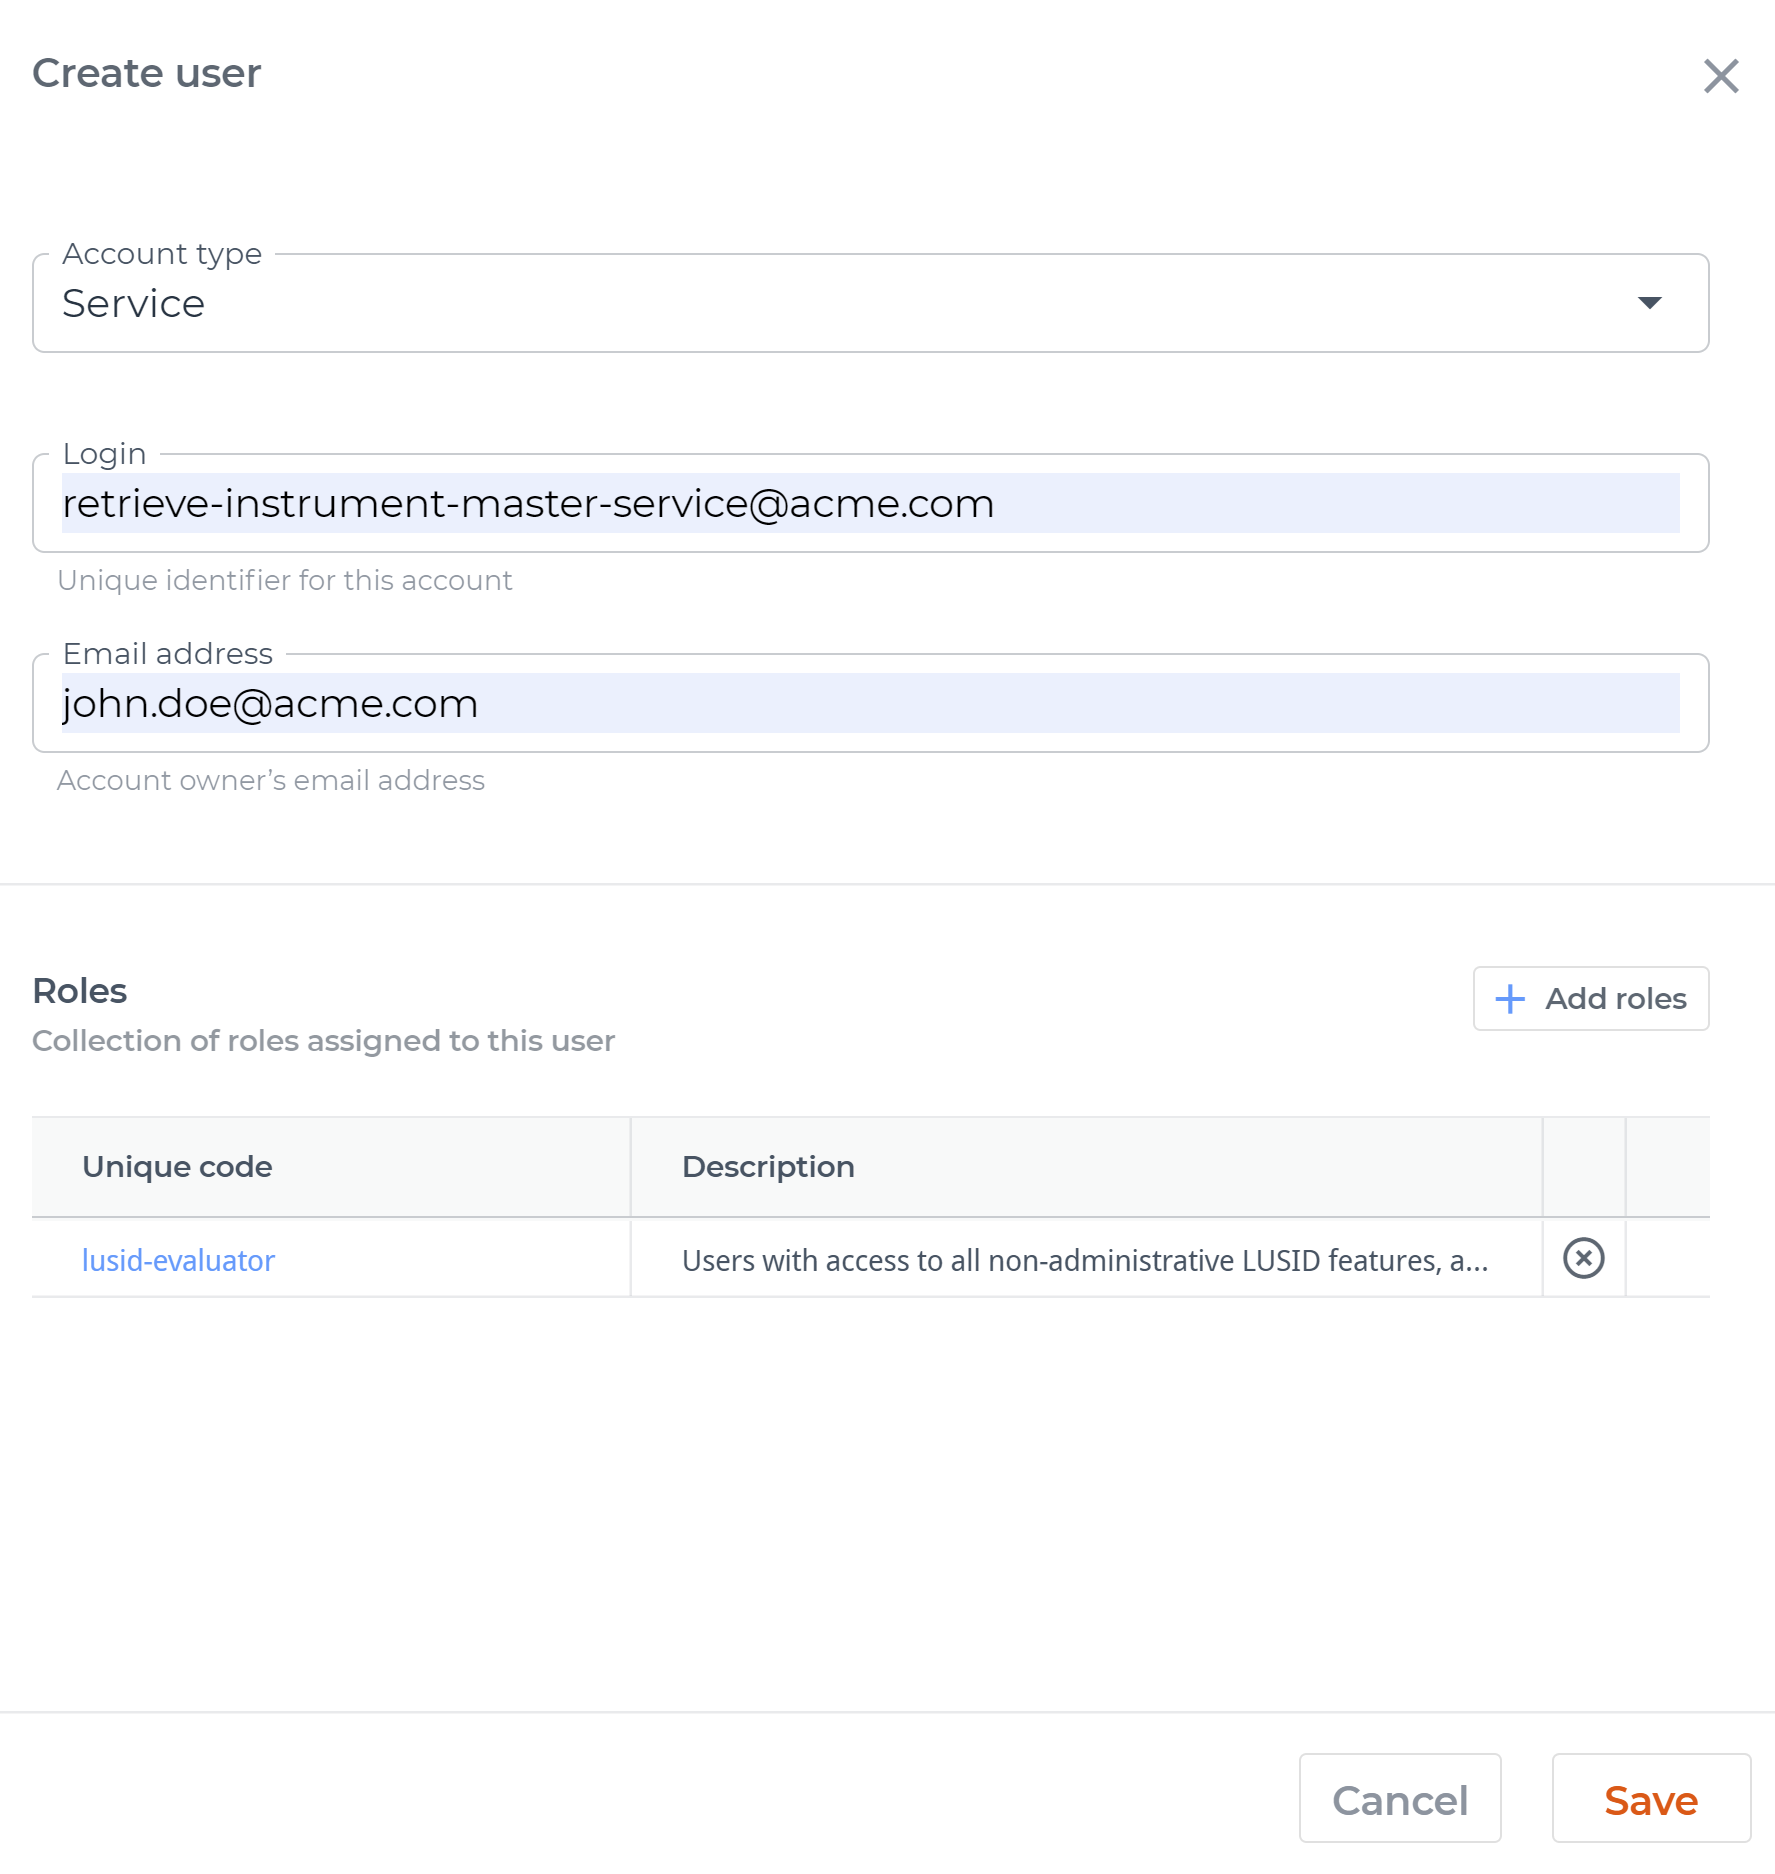
Click the Save button to send yourself an email to complete the sign up process.
Follow the instructions in the email to verify the account and specify a complex password.
Step 2: Generating a client ID and client secret
We now have a username and password for a verified LUSID service user.
In order to obtain an API access token, we also need a client ID and client secret. To generate these:
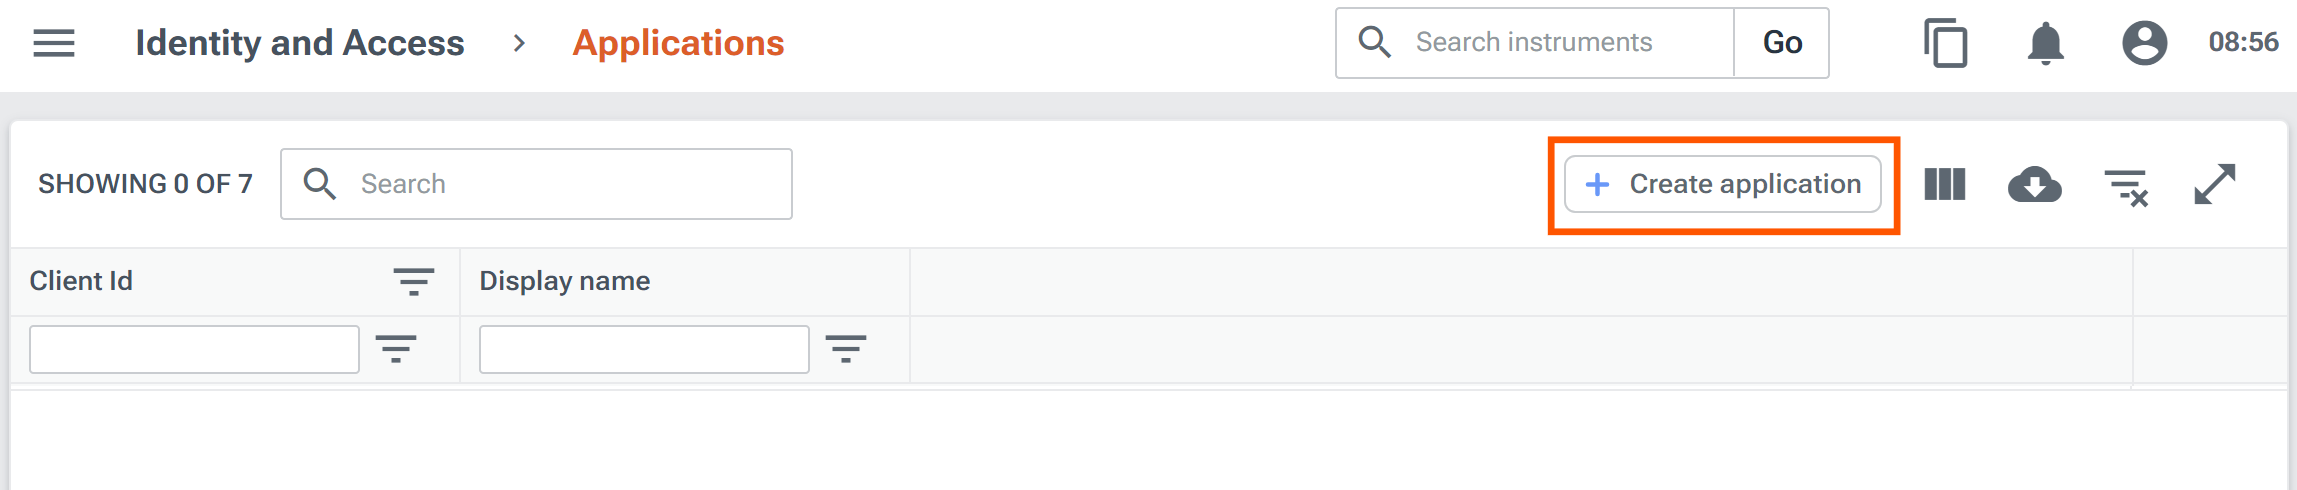
From the left-hand menu, select Identity and access > Applications.
On the Applications dashboard, click the Create application button:
Specify a Client Id (no spaces) and a Display name, and click the Save button. LUSID automatically generates a client secret.
On the Applications dashboard, click the
 View icon for the row to reveal the client secret and Okta's dedicated token URL for your LUSID domain:
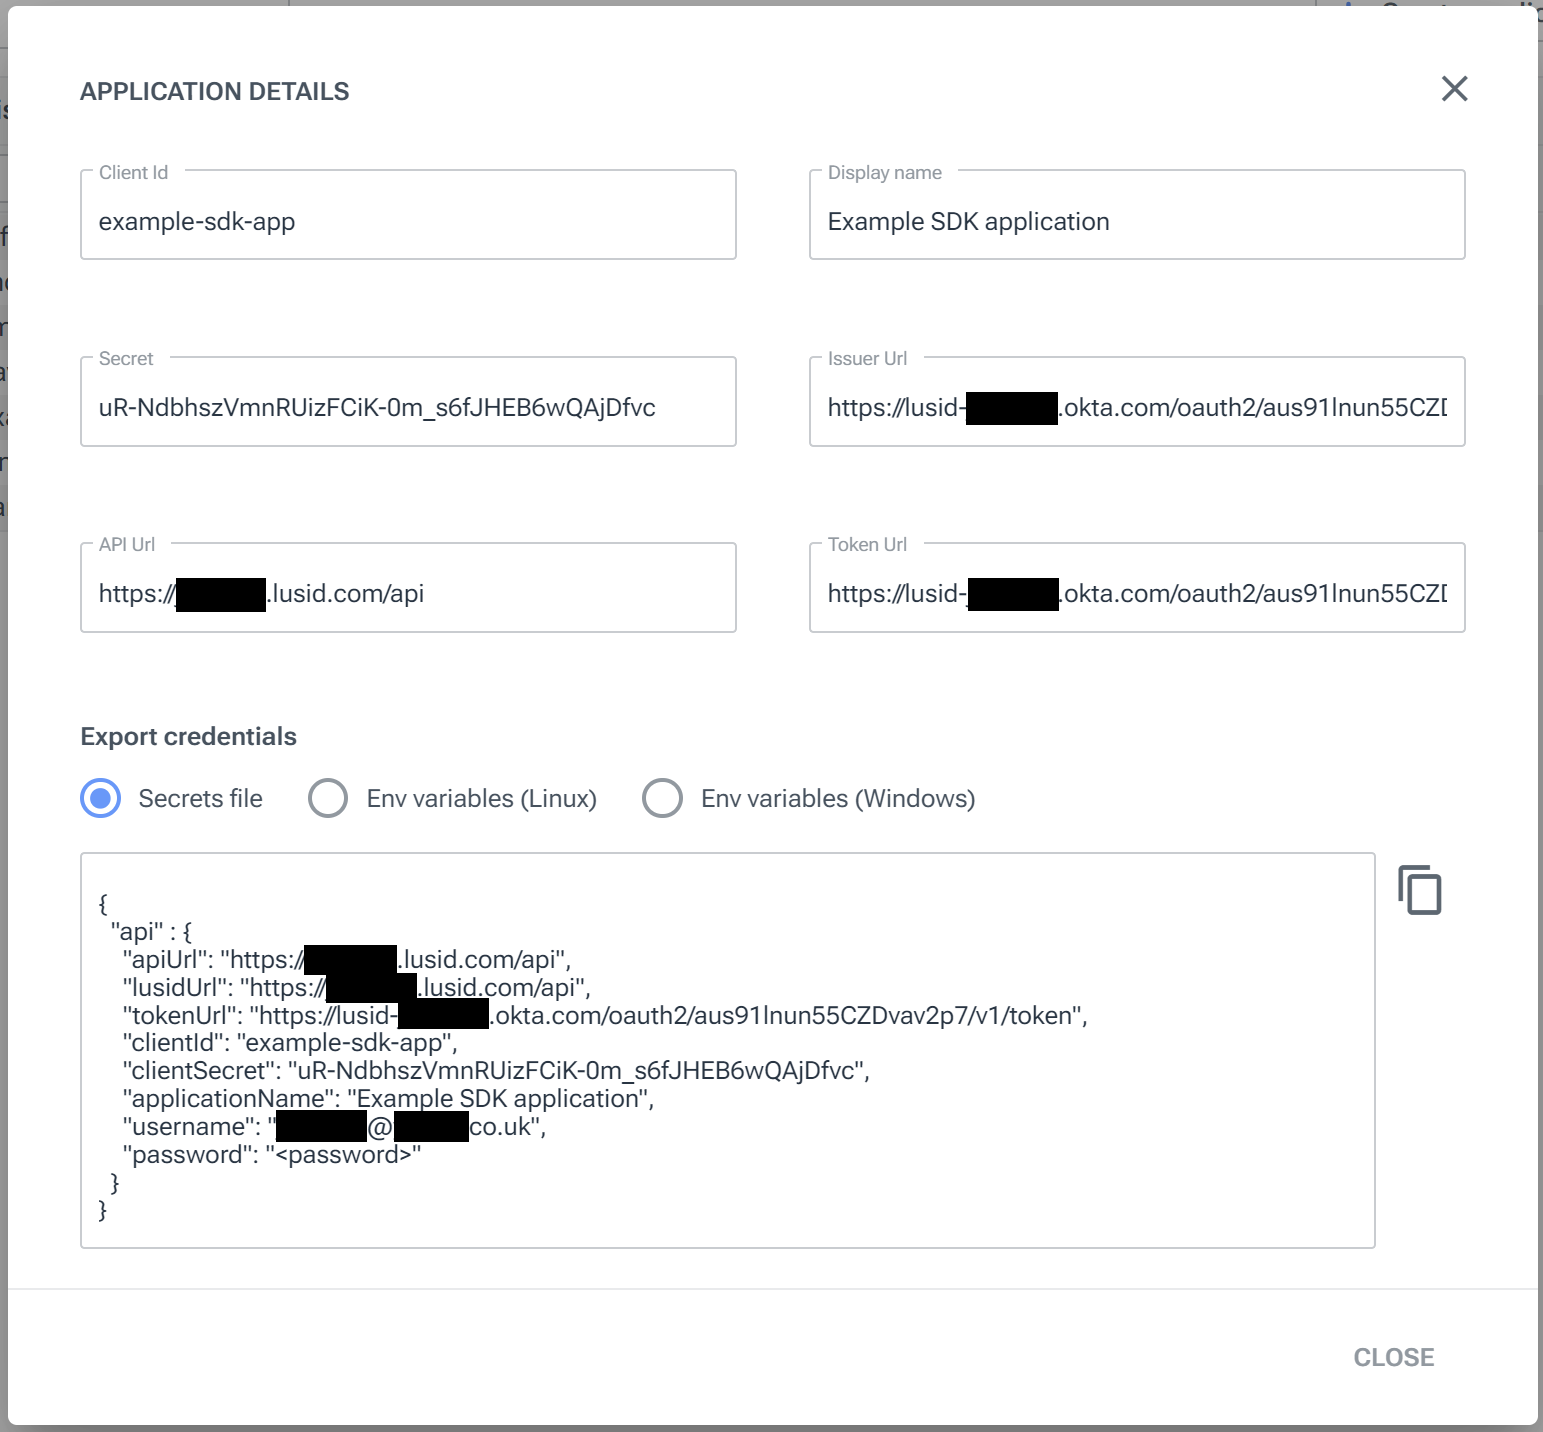
We now have:
A username and password for a verified LUSID service user.
A client ID and client secret.
A dedicated Okta token URL.
The next step depends on what you want to do:
Step 3: Explicitly obtaining an API access token and calling the REST API directly
Note: This step assumes you have installed curl (similar tools are available).
To call the LUSID REST API directly we must obtain an API access token and supply it as a Bearer token in the Authorization HTTP header:
Make a POST request to your dedicated Okta token URL, passing in the username, password, client ID and client secret, suitably encoded:
curl -X POST <your-okta-token-url>
   -H "Content-Type: application/x-www-form-urlencoded; charset=ISO-8859-1"
   --data-urlencode grant_type="password"
   --data-urlencode username="<your-username>"
   --data-urlencode password="<your-password>"
   --data-urlencode scope="openid client groups"
   --data-urlencode client_id="<your-client-id>"
   --data-urlencode client_secret="<your-client-secret>"
The response from Okta contains 2 tokens (actual data shortened for brevity):
{
   "token_type": "Bearer",
   "expires_in": 3600,
   "access_token": "eyJraWQiOiJvZDFzeFk4WTlPalMyZ2dZT3VidVBYT2dRX0dURkcwZ1...wmlxPjh49DYeEuh_w4vt2Q",
   "scope": client groups openid",
   "id_token": "eyJraWQiOiJvZDFzeFk4WTlPalMyZ2dZT3VidVBYT2dzeFk4WTlPalMKi8...Mh66mG9j7zfyQxsp7UPC4J"
}
Extract the first token, keyed
access_tokenand endingwmlxPjh49DYeEuh_w4vt2Qin this example.Call the ListInstruments API, passing in the
access_token. Note here we are limiting the request to just the first instrument:curl -X GET https://<your-domain>.lusid.com/api/api/instruments?limit=1 -H "Authorization: Bearer eyJraWQiOiJvZDFzeFk4WTlPalMyZ2dZT3VidVBYT2dRX0dURkcwZ1...wmlxPjh49DYeEuh_w4vt2Q" | python3 -m json.tool
The response might be as follows (in this case piped through the Python json.tool module to make it easier to read):
    "values": [
        {
            "scope": "default",
            "lusidInstrumentId": "CCY_EUR",
            "version": {
                "effectiveFrom": "0001-01-01T00:00:00.0000000+00:00",
                "asAtDate": "2024-07-26T14:29:32.6442480+00:00",
                "asAtCreated": "2020-12-01T09:19:38.1233560+00:00",
                "asAtModified": "2020-12-01T09:19:38.1233560+00:00",
                "asAtVersionNumber": 1,
                "entityUniqueId": "7d99b09a-1ca6-45c5-aa1e-28e16f64daa5",
                "stagedModificationIdModified": ""
            },
            "name": "EUR",
            "identifiers": {
                "LusidInstrumentId": "CCY_EUR",
                "Currency": "EUR"
            },
            "properties": [],
            "state": "Active",
            "assetClass": "Money",
            "domCcy": "EUR",
            "relationships": []
        }
    ]
}
Step 4: Enabling the LUSID SDK to obtain an API access token on demand
Now we'll perform the same operation using v2 of the LUSID Python SDK (available in other languages and frameworks).
The SDK has helper classes that automate the process of obtaining an API access token and refreshing it upon expiry, so we don't need to supply one directly. Instead, we store the username, password, client ID, client secret and dedicated Okta token URL either as environment variables or in a secrets file, and make it available to the SDK.
In this example we'll use a secrets file (alternatively, see the instructions for environment variables):
Go back to the LUSID web app and select Identity and access > Applications.
On the Applications dashboard, click the
 View icon for the application we created in Step 2.
In the Export credentials area, make sure Secrets file is selected and copy the data to the clipboard:
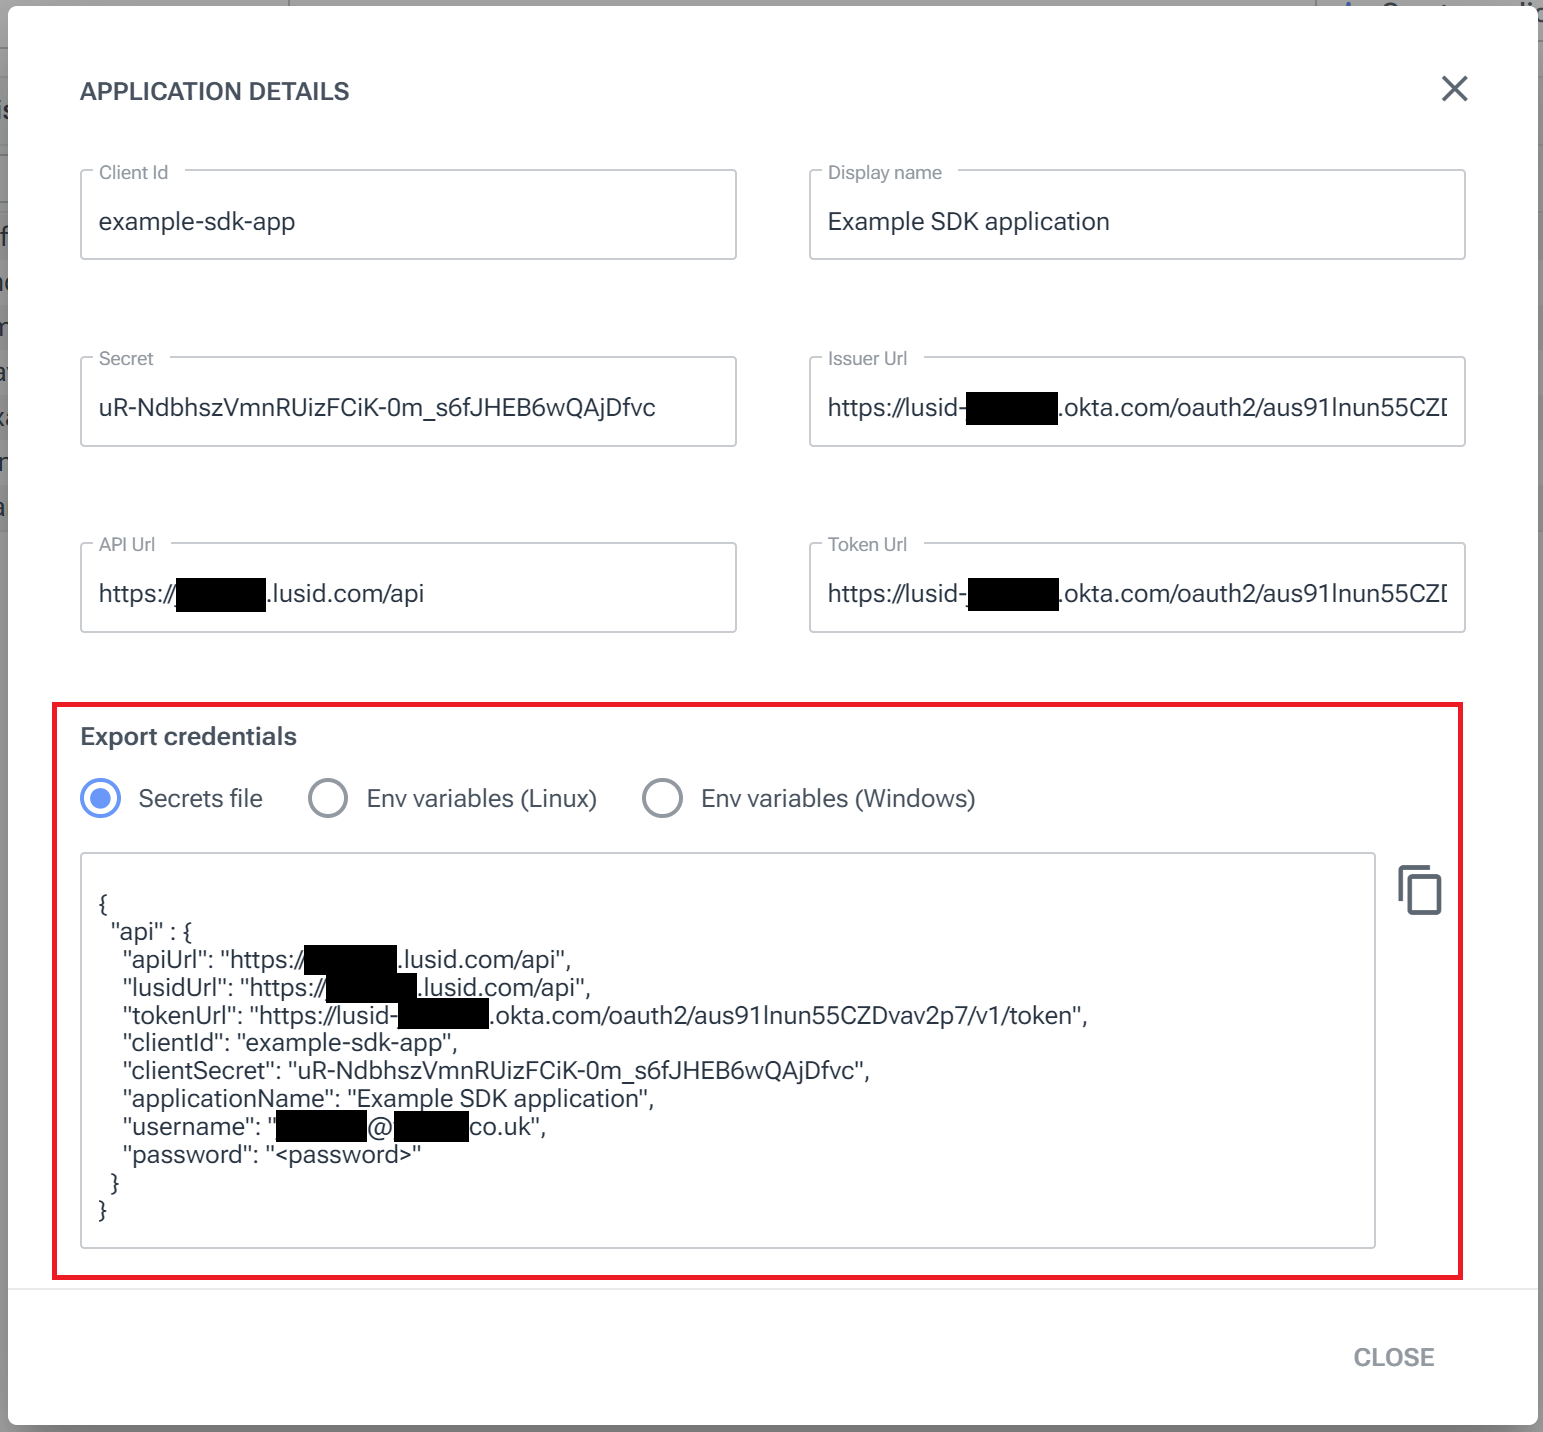
Paste the data into an appropriate local file, for example
secrets.json, supplying the user's actual LUSID password instead of<password>.
Providing secrets.json is in the same directory, the following script demonstrates generating an API access token automatically using the synchronous version of the SDK when the InstrumentsApi.list_instruments method is called:
# Setup:
import lusid, pprint
from lusid.extensions import SyncApiClientFactory

# Authenticate:
api_factory = SyncApiClientFactory()

# Build Instrument API and list first instrument:
instruments_api = api_factory.build(lusid.InstrumentsApi)
response = instruments_api.list_instruments(limit=1)
pprint.pprint(response.to_dict()["values"])
Note: For an example of using the asynchronous version of the SDK, see the Github readme.
The response is formatted slightly differently but contains the same information:
[{'assetClass': 'Money',
  'domCcy': 'EUR',
  'identifiers': {'Currency': 'EUR', 'LusidInstrumentId': 'CCY_EUR'},
  'links': None,
  'lusidInstrumentId': 'CCY_EUR',
  'name': 'EUR',
  'properties': [],
  'relationships': [],
  'scope': 'default',
  'state': 'Active',
  'version': {'asAtCreated': datetime.datetime(2020, 12, 1, 9, 19, 38, 123356, tzinfo=datetime.timezone.utc),
              'asAtDate': datetime.datetime(2024, 7, 26, 13, 30, 0, 933026, tzinfo=datetime.timezone.utc),
              'asAtModified': datetime.datetime(2020, 12, 1, 9, 19, 38, 123356, tzinfo=datetime.timezone.utc),
              'asAtVersionNumber': 1,
              'effectiveFrom': datetime.datetime(1, 1, 1, 0, 0, tzinfo=datetime.timezone.utc),
              'entityUniqueId': '4b3a0cba-45cc-483b-857a-f273460bd5af',
              'requestIdCreated': None,
              'requestIdModified': None,
              'stagedModificationIdModified': '',
              'userIdCreated': None,
              'userIdModified': None}}]
Note if secrets.json is not in the same directory, or has a different file name, you must specify a SecretsFileConfigurationLoader:
# Setup:
import lusid, pprint
from lusid.extensions import (
    SyncApiClientFactory,
    SecretsFileConfigurationLoader
)

# Authenticate:
secrets_path = "/path/to/secrets.json"
config_loaders=[
    SecretsFileConfigurationLoader(secrets_path)
]
api_factory = SyncApiClientFactory(config_loaders=config_loaders)

# Build Instrument API and list first instrument:
instruments_api = api_factory.build(lusid.InstrumentsApi)
response = instruments_api.list_instruments(limit=1)
pprint.pprint(response.to_dict()["values"])